인프런 '실전! 스프링 부트와 JPA 활용1 - 웹 애플리케이션 개발' 강의를 들으며 정리한 내용입니다.
1. 프로젝트 생성
- Spring Initializr : https://start.spring.io/ 사이트 접속

- Project : Gradle - Groovy
- Language : Java
- Spring Boot : 2.7.8
- Group : jpabook
- Artifact : jpashop
- Packaging : Jar
- Java : 11
- Dependencies
- Spring Web
- Build web, including RESTful, applications using Spring MVC. Uses Apache Tomcat as the default embedded container.
- Thymeleaf
- A modern server-side Java template engine for both web and standalone environments. Allows HTML to be correctly displayed in browsers and as static prototypes.
- Spring Data JPA
- Persist data in SQL stores with Java Persistence API using Spring Data and Hibernate.
- H2 Database
- Provides a fast in-memory database that supports JDBC API and R2DBC access, with a small (2mb) footprint. Supports embedded and server modes as well as a browser based console application.
- Lombok
- Java annotation library which helps to reduce boilerplate code.
- Validation
- Bean Validation with Hibernate validator.
- Spring Web
2. 프로젝트 Import
- 프로젝트 Open > 압축해제한 폴더 내 build.gradle 파일 선택
3. 프로젝트 설정 및 실행
- main에서 Run 실행. (JDK의 경우 위에서 설정한 11버전이 설정되어 있어야 함)
- localhost:8080 또는 127.0.0.1:8080 이 다음과 같이 뜨면 정상.
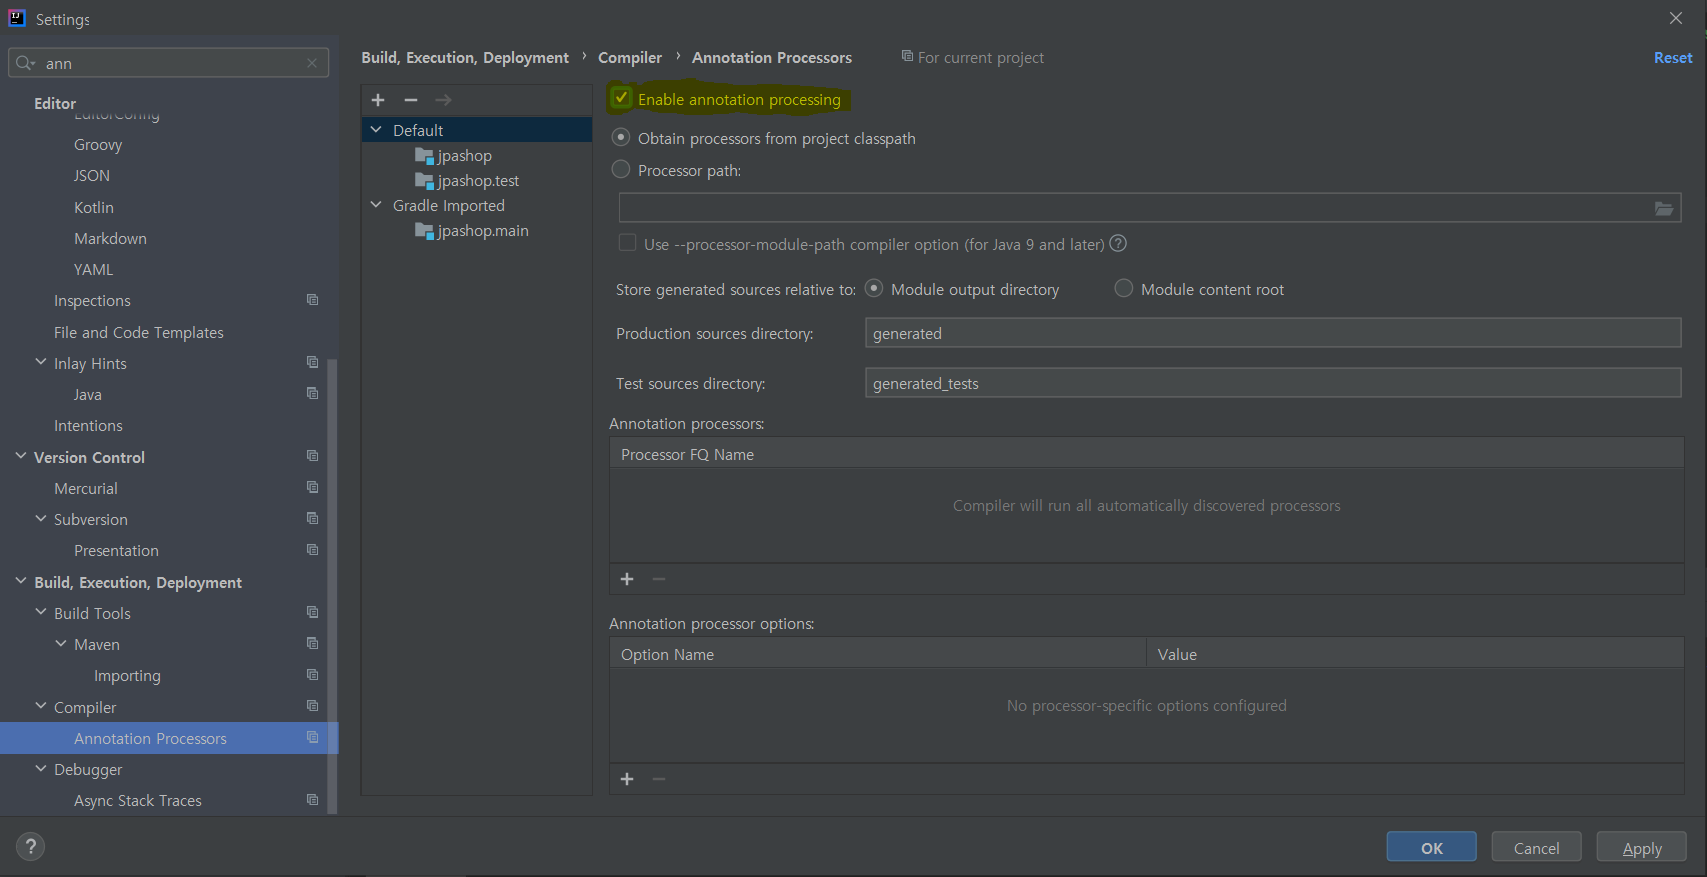
- lombok 사용을 위한 annotation processors 설정
- 인텔리제이 기본 설정은 Gradle, 빠른 실행을 위해서는 다음과 같이 IntelliJ IDEA로 설정을 변경하는 것이 좋음
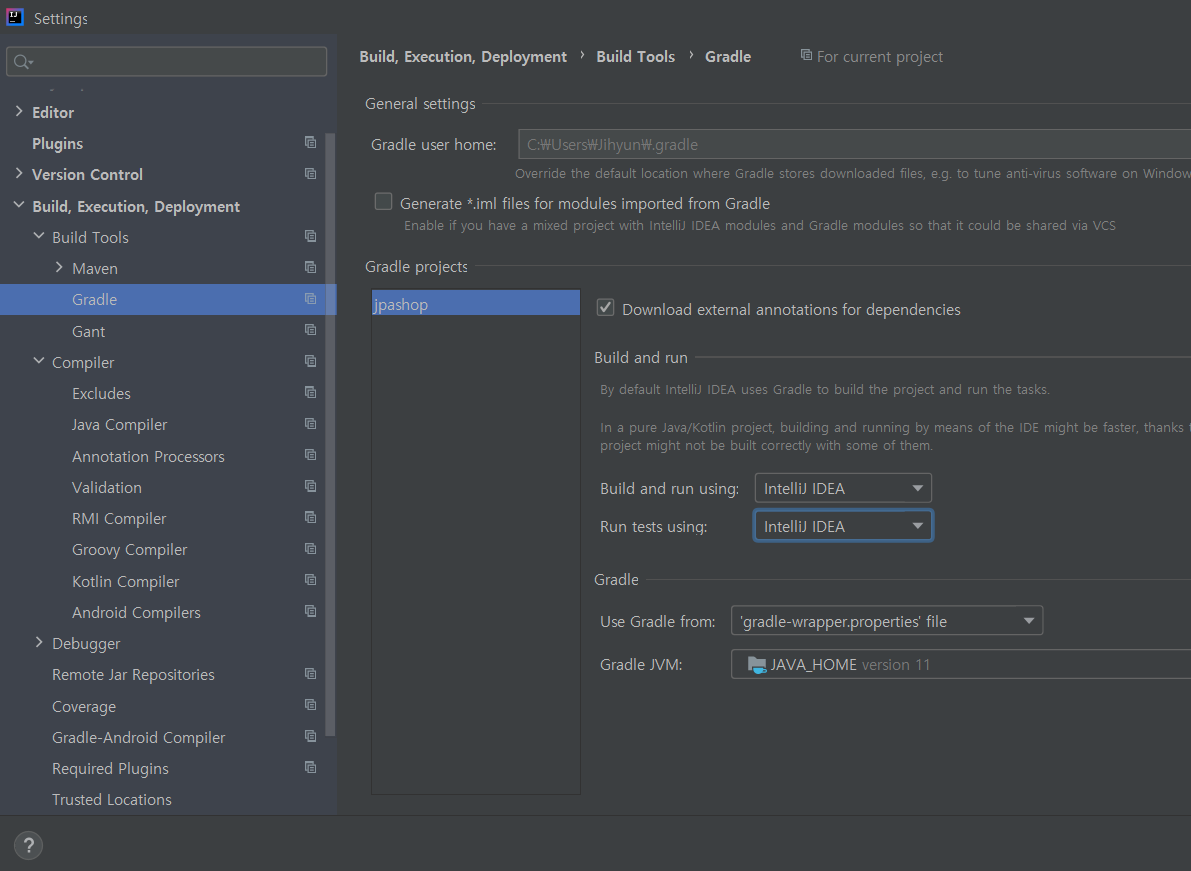
- Settings > Build, Execution, Deployment > Build Tools > Gradle
- Build and run using: Gradle => IntelliJ IDEA
- Run tests using: Gradle => IntelliJ IDEA
'STUDY > SpringBoot+JPA' 카테고리의 다른 글
| [스프링부트-JPA-1] 라이브러리 살펴보기, View 환경 설정 (0) | 2023.02.11 |
|---|
